How To Remove Window Tint – The Ultimate Guide
Tinted windows come with many benefits for car owners, but they won’t last forever. So when the time comes, you’ll need to know how to remove window tint.
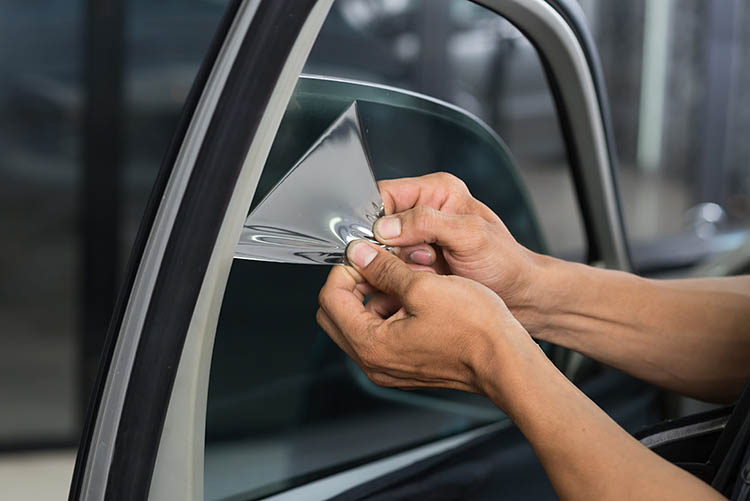
- Introduction
- How to Remove Window Tint
- Method 1 – Hairdryer or heat gun
- Method 2 – Steamer
- Method 3 – Soap & Water
- Frequently Asked Questions
- Conclusion
Introduction
Tinted windows don’t just enhance the look of your ride. They also come with numerous additional advantages, especially for those of you living in hotter climates.
However, much like cars, window tints also have a limited lifespan, which can vary depending on various factors.
Typically, window tints can last for around 5-15 years, depending on the quality of the tinting film and sun exposure.
Cheap window tinting (commonly found on JDM imports) is often a lower standard than the premium alternative, requiring a little more effort when removing the film, but even if this is the case, don’t panic – we’ve got you covered!
Once your car window tint film begins deteriorating or no longer looks the part, it’s time to remove the tints from your car windows.
Although this may sound like a daunting task, and you may have been quoted a ridiculous price from your local tinting company – fear not, we’ve got you covered!

With this guide, we’ll provide various ways to remove your window tint so that you won’t need to spend your hard-earned money on these simple, DIY window tint removal procedures.
And the best part is that we’ve made this easily possible using consumables that you’ll likely have in your house or garage, and the final result will look identical to the pros – assuming you’re careful!
So, with that covered, let’s take a look at our three favorite methods to remove window tint from your car windows.
How to Remove Window Tint
Whether your film has been degrading over time or the cops have pulled you for excessive tinting, these methods will provide the perfect solutions for you to carry out a DIY window tint removal at home.
When removing old window tint, you’ll either struggle to remove the film or have with sticky glue, residue, or adhesive on your glass. If this is the case, don’t panic – we can assure you it looks far worse than it is!
Firstly, if you’re trying to remove your car window tint without knowing the process, we recommend stopping right now and following one of our simple procedures.
Method 1 – Hairdryer or heat gun
Let’s face it, most of us have a hairdryer around the house. Although it may not be yours, we’re sure that they won’t mind you borrowing it for this worthwhile cause!
If that’s not the case, you can also use a heat gun, but we’d proceed with caution when using these due to their intensity, especially with windscreens or rear windows with fragile heating/defrosting elements.
Recommended equipment:
- Hairdryer/heat gun
- Razorblade
- An old, clean towel or microfiber cloth
- Glass cleaner
- Isopropyl alcohol/nail polish remover (optional)
Step 1) Firstly, roll your window down slightly to begin on a corner or edge of the tint, and ensure that you keep around 8-inches from the surface as you risk warping the glass or melting the film.
Keep the hairdryer or heat gun moving over the small section inside the window, repeatedly moving back and forth until it’s heated enough to melt the adhesive behind the film.
Step 2) At this point, you can either use your fingernails to pull the corner away or carefully slide the razor blade between the glass and the tint, allowing you to begin peeling it off slowly.
Both the film and adhesive should remove cleanly after heating, but if that’s not the case, you’ll need to heat the area longer.
Step 3) Once you’ve nailed the procedure on the first small section, it’s time to begin heating the remaining area of the window in small sections at a time and peeling away as you go.
Remember to put the window back up if you’re struggling to remove the bottom part of the tint.
Step 4) Assuming the window tint was applied correctly during the initial installation, you should have minimal residue remaining.
In this case, you can use the glass cleaner and cloth to get the surface looking like no tint was ever applied.
If you’re struggling to remove the remaining residue, try using isopropyl alcohol or nail polish remover before wiping away with the microfiber cloth.
Method 2 – Steamer
Although not as commonly found, these underrated appliances can have many uses around the house and in your vehicle.
The steaming process is almost identical to the hairdryer/heat gun method above, but since a steamer is far more glass-friendly, it’s the preferred method where possible.
Recommended equipment:
- Steamer
- Razorblade
- An old, clean towel or microfiber cloth
- Glass cleaner
- Isopropyl alcohol/nail polish remover (optional)
Step 1) Firstly, roll your window down slightly, and begin moving the steamer around 2-inches away from the outside window glass.
Ensure that you pay close attention to getting the edges warmest while moving the steamer around the entire window.
Step 2) After heating the outside glass, move onto the inside, repeating the same process, ensuring even coverage, and prioritizing the edges.
Step 3) At this point, you can either use your fingernails to pull the corner away or carefully slide the razor blade between the glass and the tint, allowing you to begin peeling away slowly.
Both the film and adhesive should remove cleanly, but if that’s not the case, you’ll need to continue steaming the area for longer.
Step 4) Once you’ve successfully pulled away from the first small section, it’s time to continue steaming the remaining area of the window, cleanly removing the remaining film from the glass as you go.
Remember to put the window back up if you’re struggling to remove the bottom part of the tint.
Step 5) Assuming the window tint was applied correctly during the initial installation, you should have minimal residue remaining, or perhaps none at all.
In this case, you can use the glass cleaner and cloth to get the surface looking like no tint was ever applied.
If the remaining adhesive residue is stubborn, try using isopropyl alcohol or nail polish remover before wiping away with the microfiber cloth.
Method 3 – Soap & Water
Although this isn’t our preferred method, it can be a more time-consuming alternative if you don’t have a heat source available, such as a hairdryer, heat gun, or steamer.
Recommended equipment:
- Warm water (in a spray bottle)
- Soap
- An old, clean towel or microfiber cloth
- Glass cleaner
- Razorblade
- Isopropyl alcohol/nail polish remover (optional)
Step 1) Begin by lowering the glass and applying a small amount of typically soapy water for dishwashing from the spray bottle to the most convenient edge or corner of the surface for peeling away the tint.
We’re using the soapy mixture as a lubricant to ease the peeling process.
Step 2) Use your fingernail, or carefully slide a razor between the tint and the glass on the lubricated area.
Step 3) Once you’ve pulled away enough film to get a grip on the tint, use both hands to pull it as evenly as possible, applying a little more soapy water between the layers if it’s resisting.
Step 4) At this point, you should hopefully have the majority of the film pulled off. However, you may need to carefully repeat the razorblade step to the new edges if necessary – don’t forget to put the window up for the final section.
Step 5) Since no heat was applied, you’re likely left with some adhesive. If this is the case, you can generously spray the warm, soapy water before carefully using a razor blade to scrape away the residue.
Alternatively, you may prefer to use isopropyl alcohol or nail polish remover along with a microfiber cloth to remove the remnants.
How to Remove Window Tint – FAQ
Understandably, many owners want a little reassurance before going ahead with the job, which is why we’ve created this section to answer questions we’ve been asked regarding removing window tint.

When should I remove my window tint?
The lifespan of window tints can vary immensely. While we’ve seen some jobs look painfully bad from the moment they’re applied, we’ve seen other 15-year-old window tints look almost perfect.
Two of the primary considerations that affect lifespan are the quality of the film and the adhesive used, which is certainly worth considering when it comes to your replacement choice.
When your window tint film requires replacing, it’ll often have bubbles appearing between the glass and film, and unfortunately, the best thing to do here is to start over.
UV rays can also make your film deteriorate with age, which is when the window tint begins turning a purple color, with a detrimental effect on its ability to block the sun’s harmful UV rays.
Additionally, if you intend to move states and decide to book car shipping services, you might want to check if window tint is legal in your destination; you might want to schedule your tint removal just ahead of that.
What can go wrong when removing window tints?
Although we never like to think about the worst-case scenarios, it’s good to know what to avoid!
Removing window tint is a reasonably straightforward process, but you’ll need to ensure that you’re patient and don’t try to rush it.
Using a razor blade
The most likely instance where things can go wrong is using a blade, where if you catch the glass at the wrong angle, you could leave a nasty scratch behind, or even worse, potentially end up at the hospital.
For that reason, always take absolute care when using the blade, and try to keep it flat with the surface, carefully sliding it between the glass and the film.
Using a heat gun/hairdryer
It’s easy to underestimate the heat build-up that comes with using these appliances, which could potentially warp the glass and melt the film, creating additional work and likely making a mess in the process.
On top of that, if you’re working with glass that has heating elements (rear/front windscreen defrosters being a typical example), then you’ll potentially damage these if too much heat is applied.
For these reasons, ensure that you keep the heat appliance a reasonable distance away from the glass and keep it moving at all times.
Frequently touch the surface to check for heat build-up, and wait a few moments if you fear it may be getting excessive.
Remember, it’s better to be safe (and patient) than sorry!
How to remove brittle window tint
When removing brittle or peeling window tint, the procedure will be the same. It’s just likely to require a little more work and patience!
You’ll likely have more edges, so carefully slide the razor blade between the glass and tint layer or use your nails to peel away before carrying out the steps in your preferred method above.
With brittle tint, you’re likely to have adhesive left behind, where dabbing isopropyl alcohol onto the surface can be highly efficient.
How to remove window tint from perspex/plexiglass
Although this isn’t a standard procedure, we’ve seen it on drift cars and the aviation industry.
When removing plexiglass tint, it’s best to approach with caution, as it’s far easier to scratch than glass.
If you have to take a razor blade to the edge, be as careful as possible, but preferably try using something a little more subtle beforehand.
Once you can remove a corner, the best way is to carefully pull the film off as it is, as the plexi will be extremely sensitive to heat.
We recommend using specific products safe for use on the material when removing the adhesive, as harsh chemicals can cause irreversible damage or deep scratching.
Should I get a professional to remove my window tint?
Honestly? We certainly wouldn’t.
We’ve heard of tinting professionals charging ridiculous amounts for this simple procedure, and the chances are that once you’ve innocently handed over your keys, they’ll only carry out one of the methods used in this guide.
For that reason, we highly recommend removing your window tint yourself, and we promise it won’t be nearly as challenging as you’re concerned it may be.
Conclusion
If you’ve been looking for ways to remove window tint, you may have come across various other methods, and you’re probably wondering why we’ve not listed them in this guide.
We want to keep things simple, and with these tried-and-tested methods, there’s something for everyone. I mean, it doesn’t get much more straightforward than soap and water!

The preferred options are either Method 1 or 2, as these will heat the adhesive, which makes it far easier to remove.
Sure, you can use ammonia, but since it can often cause damage to your car, you’ll need to mess around with sticking black trash bags to your glass and covering up specific electrical components.
Alternatively, using the soap and newspaper method will be both messy and inconvenient.
For that reason, we’ve provided three simple methods which not only make the job as simple as possible but also create no damage to your ride in the process – as long as you’re careful!
While removing window tint can seem daunting initially, it’s a highly straightforward process, which will allow you to replace your old purple-tinted or bubbling window tint with a fresh new look.

We’ve removed plenty of window tint from drift cars and future drift builds, and we’ve successfully used these methods many times, so we have no doubt that they’ll serve you well.
Now that you’ve learned everything there is to know about how to remove window tint; it’s time to get out there and get stuck in.
Remember – patience is key. You’ve got this!
So, there we have it! We hope that we’ve covered everything you could want to know about removing window tint in this guide.
Thank you for reading our how to remove window tint guide.
If you enjoyed this article, please share it with the buttons at the bottom of your screen. If you’ve found this information useful, please take a moment to share it with other automotive enthusiasts. We appreciate your support.
Photography credits
We thank the following entities for the use of their photography in this article:


